
Lesson 2
Movements / Exercises from class
Dysfunction in the Deep Core is hard to detect, but may be the cause of many of our injuries or physical ailments. Thomas Meyers argues that when there is dysfunction in our deep core, we may not notice it immediately, as our more superficial muscles can often support the load— so many difficult to discern injuries have their source in a dysfunctional deep core. Thomas Meyer’s: “failure of the DFL to work properly does not necessarily involve an immediate or obvious loss of function, especially to the untrained eye or to the less than exquisitely sensitive perceiver. Function can usually be transferred to the outer lines of myofascia, but with slightly less elegance and grace, and slightly more strain to the joints and peri-articular tissues, which can set up the conditions over time for injury and degeneration. Thus, many difficult-to-fix injuries are predisposed by an earlier failure within the DFL that is then revealed when the precipitating incident takes place.”
Forward Head Posture is a result of atrophied deep core
Forward Head Posture often indicates Deep Core Failure. Consider the head and neck—massaging the neck may bring temporary relief, but the discomfort persists because the issue lies deeper. It's like repeatedly fixing cracks in a house's walls without addressing the faulty foundation underneath. Around 66% of people suffer from Forward Head Posture, leading to neck tightness and shoulder limitations. Rectifying the deep core addresses the root cause, allowing us to then focus on the head, neck, and shoulders.
The forward position of the head makes it feel heavier. Studies reveal that for every inch the head extends forward, its perceived weight increases by 10 pounds! For instance, tilting the head 60 degrees while looking at a text message adds the equivalent of a 60-pound weight to the body. This strain is like an ox pulling a cart without a balanced yoke. Although we can adjust our shoulders momentarily, we must address what causes them to move out of alignment. This involves working with our deep core in yoga practice. While the neck muscles alone can support the head neutrally, they can't bear the load of forward head posture. Over time, this posture leads to neck muscles recruiting nearby shoulder muscles, causing imbalance in the neck, shoulder, spine, and core.
When the Deep Core is engaged, the ribcage remains neutral, and the shoulder girdle aligns over it, relieving pressure on the neck and shoulders. According to Tom Meyers, when the rib cage's structure is intact, the shoulders don't need to support the head— “If the underlying structure of the rib cage is in place…It is our contention that… the shoulders are absolutely free of any role in supporting the head.” Ideally, our shoulders should rest squarely on the rib cage, transferring weight to the axial skeleton, not the delicate neck. Over time, FHP leads to the neck muscles recruiting nearby shoulder muscles— muscles that are not situated well for such work, leading to a snowball effect of neck, shoulder, spine and core imbalance resulting from Muscular effects of FHP (https://clinicaltrials.gov/ct2/show/NCT04216862)
Play by Play: Splenius Capitis calls on Levatur Scapulae for Support
Forward Head Posture causes Splenius Capitus to recruit arm line muscle, Levator Scapula. As the head tilts forward, the Splenius Capitus quickly calls on the Levator Scapulae for support, a muscles running a nearly parallel tract. But the Levator Scapula is actually a part of your Arm line, not your lateral line. Because the Levatur Scapulae is a part of your arm line, it attaches to your scapula, a mobile bone that allows for fluid movement of the arms. Unfortunately, this is a poor anchor from which to secure the head for long periods of time, and what happens usually is that the scapula will gradually be pulled up and forward, just like you feel them do when you pretend to slouch forward. Try it and watch your scapulas creep forward. So although the Levatur Scapulaes have been called upon to help, they themselves soon become sore, and we find ourselves massaging them to increase the circulation of our over time employee. Treating the symptoms is a short term solution though, because this is bound to keep occurring until our head rests over the axial skeleton in a more balanced position, which is a much deeper postural issue.
Play by Play: SCM calls on Upper Traps for Support
In similar fashion, we see that the trapezius is a sitting duck for the same kind of recruitment program. The Sterno Cleido Mastoid calls on it to support the grapefruit from the front of the body. The upper third of our trapezius serves to rotate the head, extend the neck, and elevate the scapula, like shrugging your shoulders. When this muscle is over-used, recruited by the SCM for head balancing support, it becomes sore, just like the levator scapula. This might just be the muscle you’ve been rubbing all these years. What’s more, is that due to this chronic over-use, the trapezius loses it’s rotational mobility, and quality, and so you end of moving less and less here, opting to turn your shoulders, instead of just your neck. This fuzing of the shoulders and trunk is all too common for so many of us.
Negative/compensatory Effects of Forward Head Posture: Studies have shown that FHP weakens and lengthens deep neck flexors, including the longus capitis and longus colli, scapular stabilizers and retractors, such as the rhomboids, middle and lower trapezius, teres minor, and infraspinatus.
Muscles that FHP Shortens / over activates: deep upper cervical extensors, such as the longissimus capitis, splenius capitis, cervical multifidus, and upper trapezius, shoulder protractors and elevators, such as the pectoralis minor, pectoralis major, and levator scapula. Destabilizes shoulder girdle itself, pulls off center
Waking up the Atrophied Mid/Lower Trapezius Muscle can bring relief to upper traps, as well as neck and shoulders: To begin to help this overuse issue, we can begin to work at deeper layers of our back— specifically the middle portion of the trapezius. Waking up the mid back helps to bring the shoulder blades back from their overly shrugged position, and the lower traps stabilize the spine by bringing the entire shoulder girdle down, opposing the actions of the upper traps. Therefore, waking up the lower trapezius offsets the hyperactivity of the upper trapezius, which has the effect of relaxing that sore neck you’re rubbing. To put it simply, when we can get this grapefruit over our shoulders, instead of hanging out over empty space, our neck with relax, and one way to do that is to wake up the mid back.
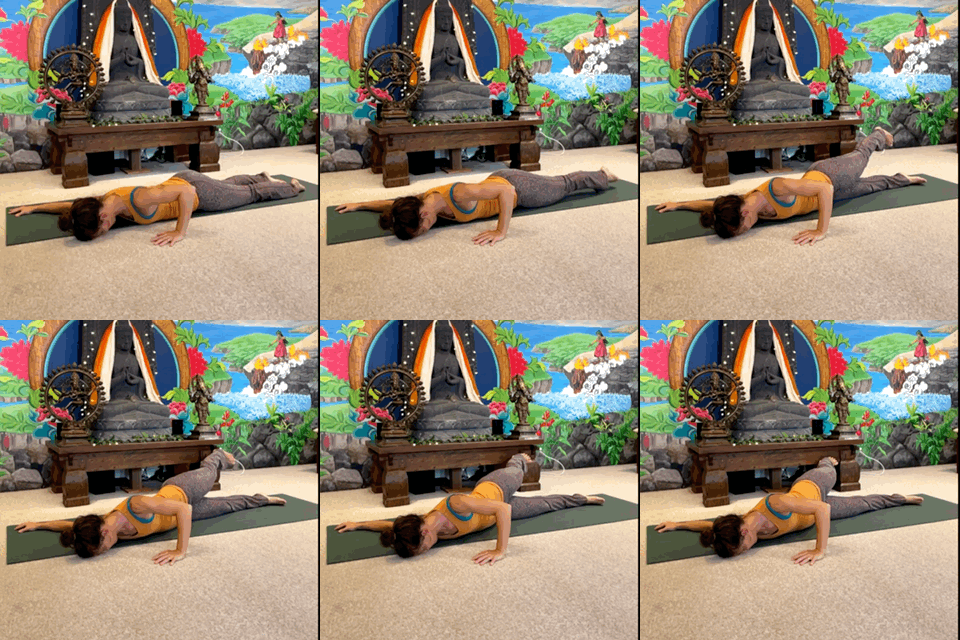
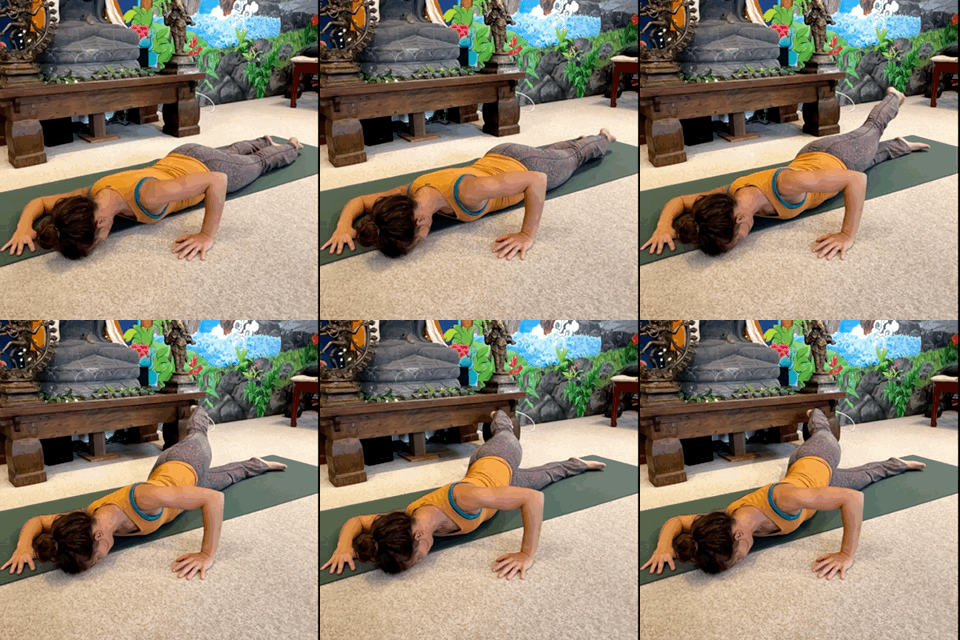
Shoulder Smear:
overview: raising awareness and breaking up crystallization through a bridge posture that utilizes a shearing action in the scapulas
from a bridge set up, find neutral pelvis and spine
anchor big toes and reach knees forward and wide towards pinky toes, gently
Wake Up Trapezius:
Overview: Before we start to work on our own trapezius, let’s take a moment to look at our own postural status. Our shoulder girdle probably leans forward or back of our center line, and it can be helpful to have an idea where you fall on the spectrum. Not so that you can fix it with a single cue, only to quietly recede back to your previous alignment, but so that you can learn to feel deeply within as we explore the deeper causes of our alignment.
TRAPEZIUS AWAKENING exercises
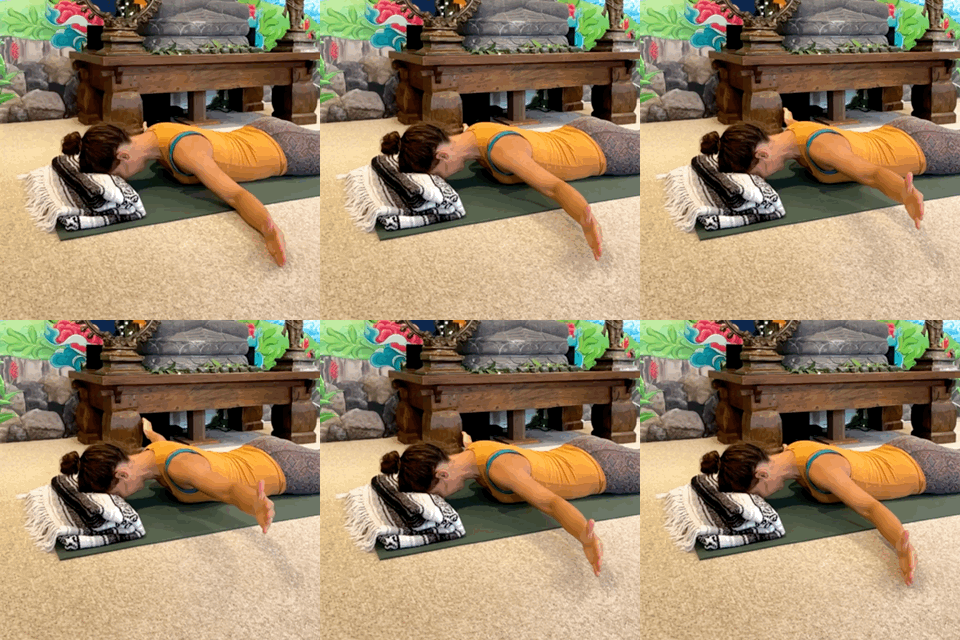
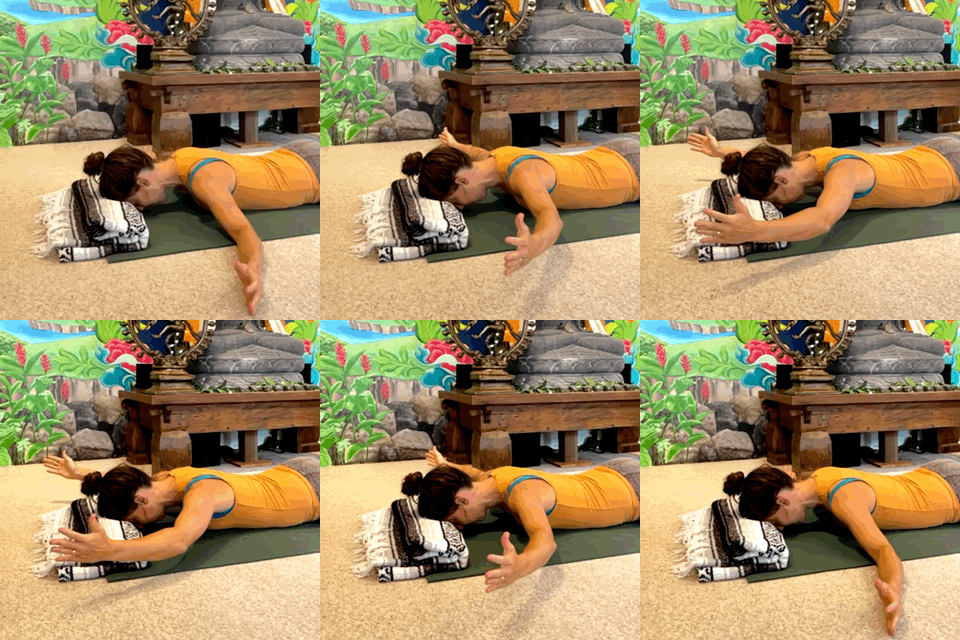
PT TRAP activation (concentric)- often when we learn to utilize a muscle, the obvious method is by shortening the muscle. While we prefer eccentrically contracting muscles (the 2nd exercise). It can be more challenging for people. We are starting with the concentric exercise so that you can get to know your mid and lower traps and the sensation of them working without recruiting the upper traps.
from kneeling, test the neck flexibility, degree and quality- from a neutral position look left and right. notice the quality of the movement as the neck rotates, does it feel smooth? Sticky? tight? look right and measure where the chin stacks over the right collar bone to get a sense of how many degrees to the right you are able to easily turn the neck. Repeat on the left side
recline on belly, connect ribs and pelvis (aka find neutral)
arms to T
lift thumbs and then place palms down, externally rotating humerus and then releasing (repeat)
lift arms, making sure spine does not extend, feel between the shoulders and towards the low back, make sure the space above shoulders and neck stay completely relaxed
float arms towards a “Y” position
push back to devotional
take a few cat rolls
sit back on to heels and retest the neck rotation to see if the quality of the movement has improved and whether you can rotate the head more comfortably towards left and right sides
Eccentric trap exercise- This excercise helps us activate the traps in a lengthen position which contributes to improved posture, enhanced shoulder stability, better functional movement, and reduced muscle tension.
test neck from cross legged
lie back
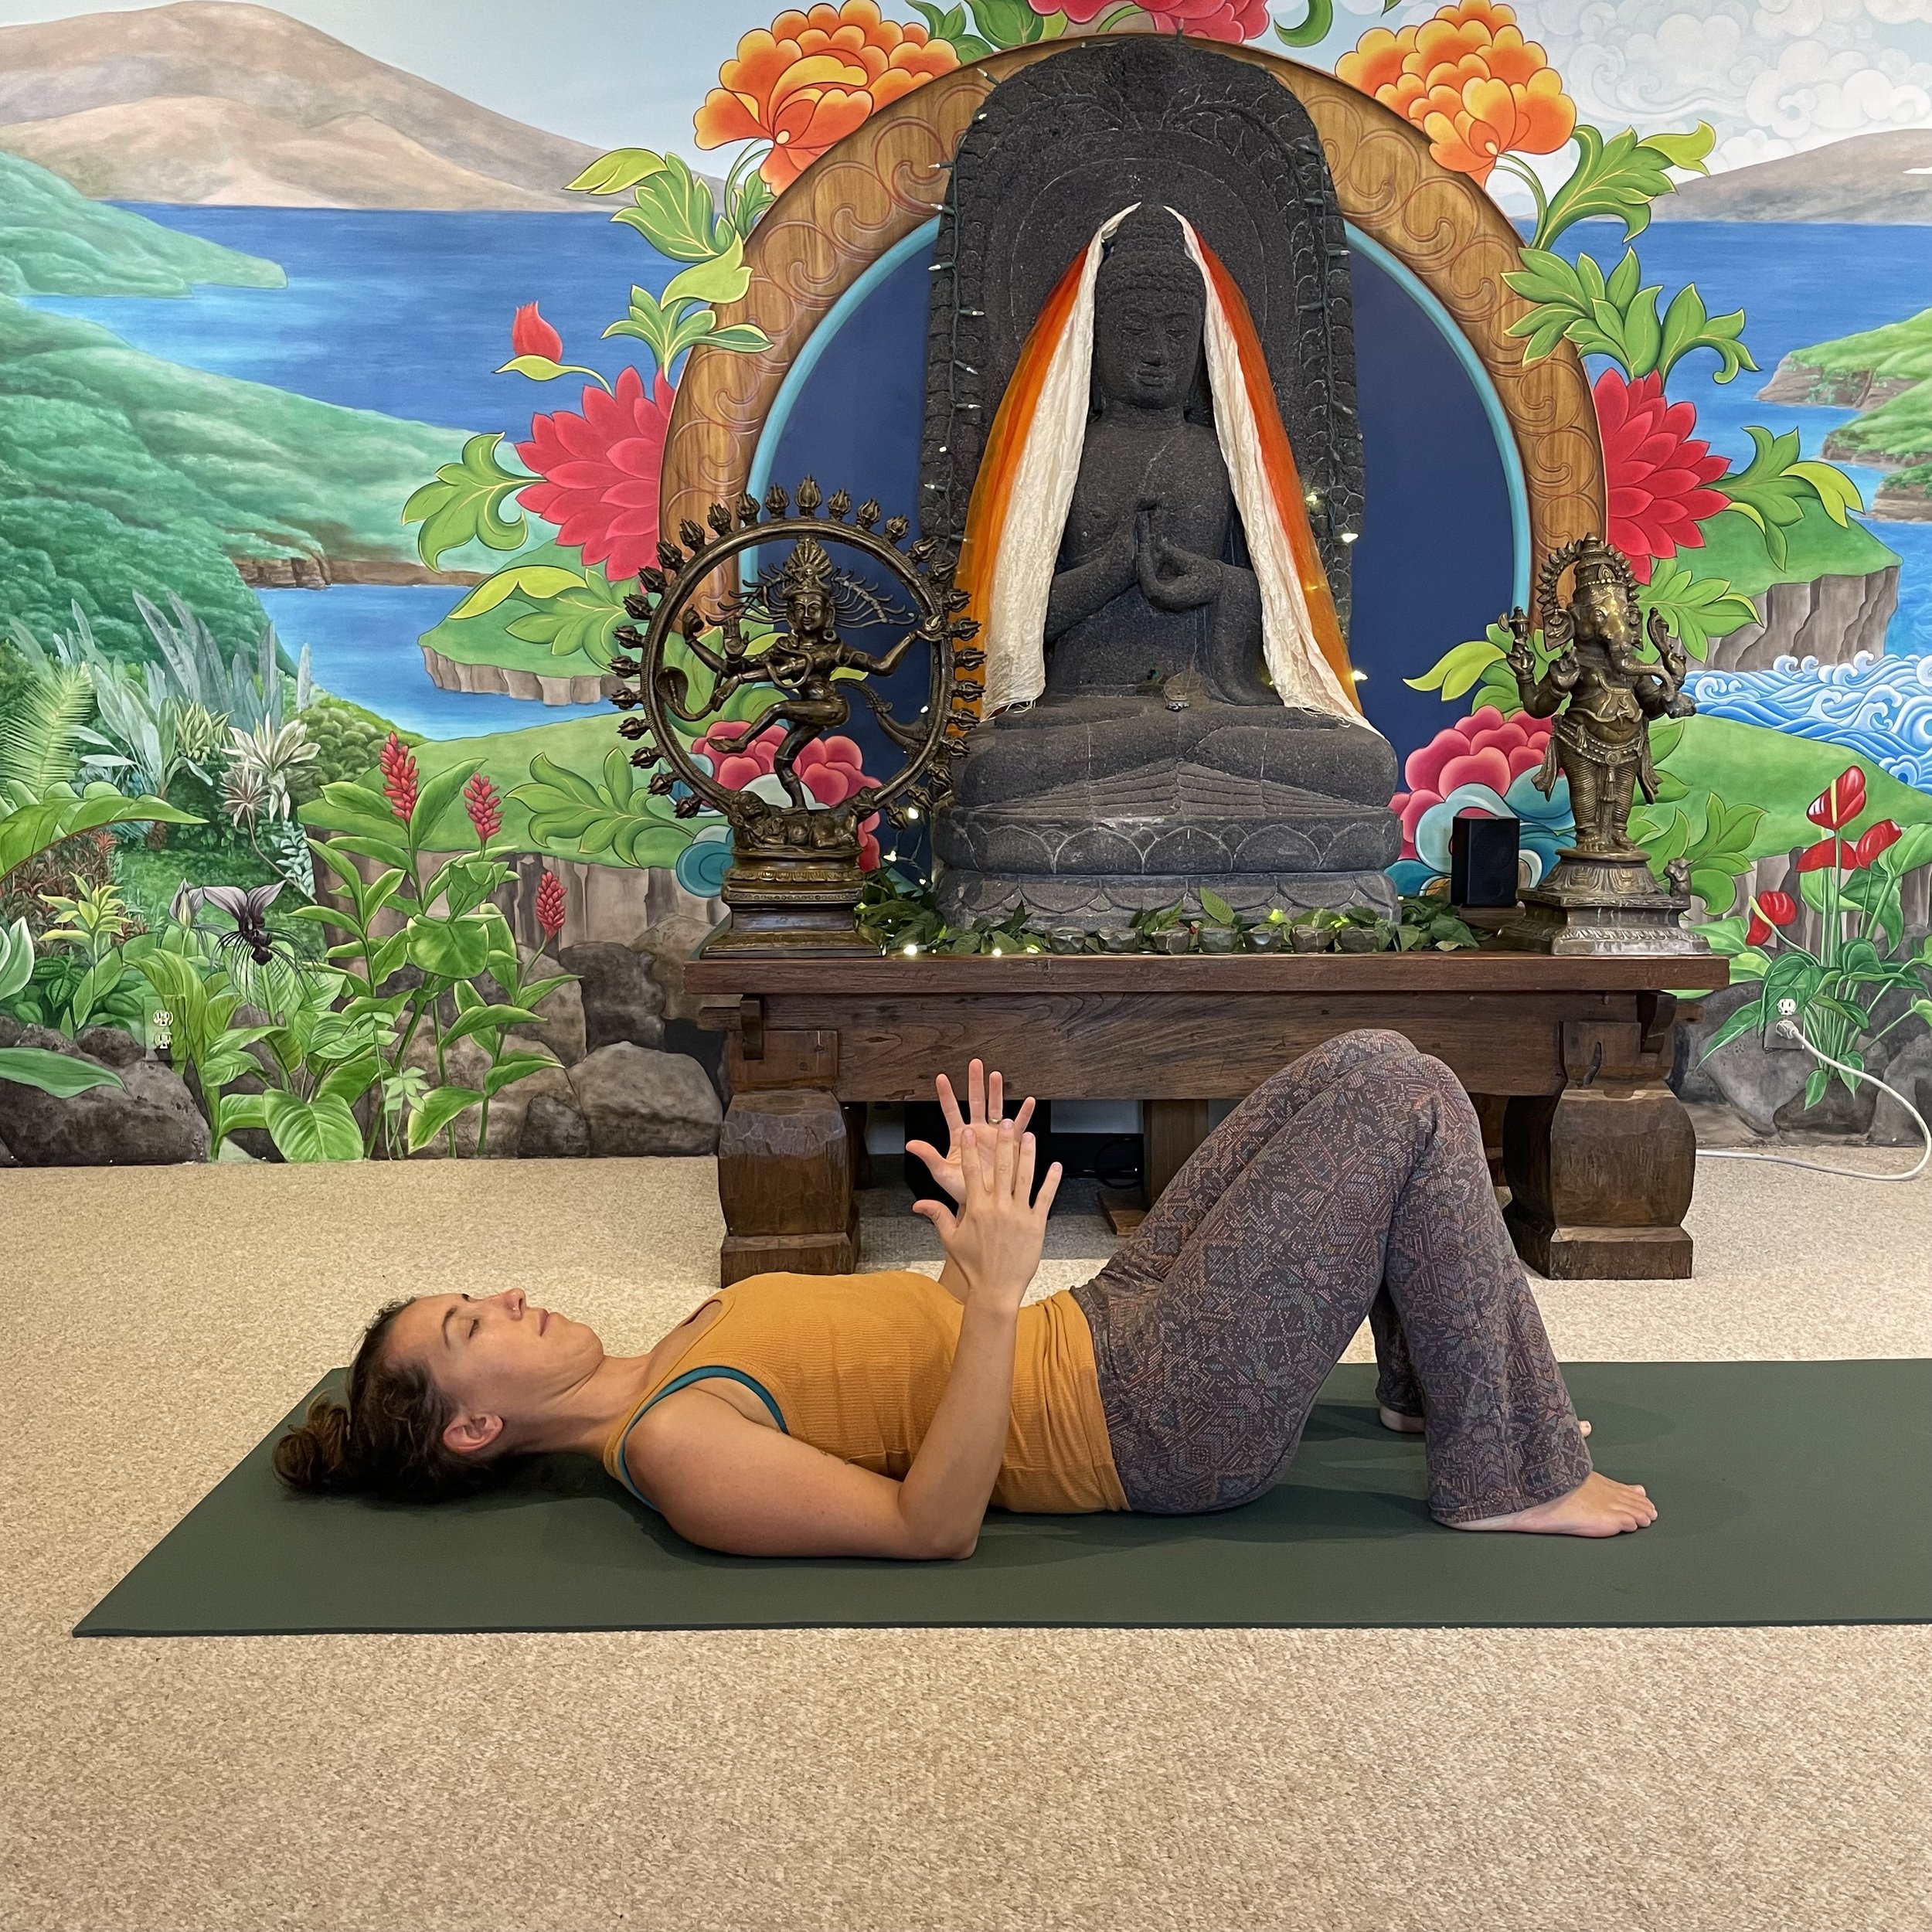
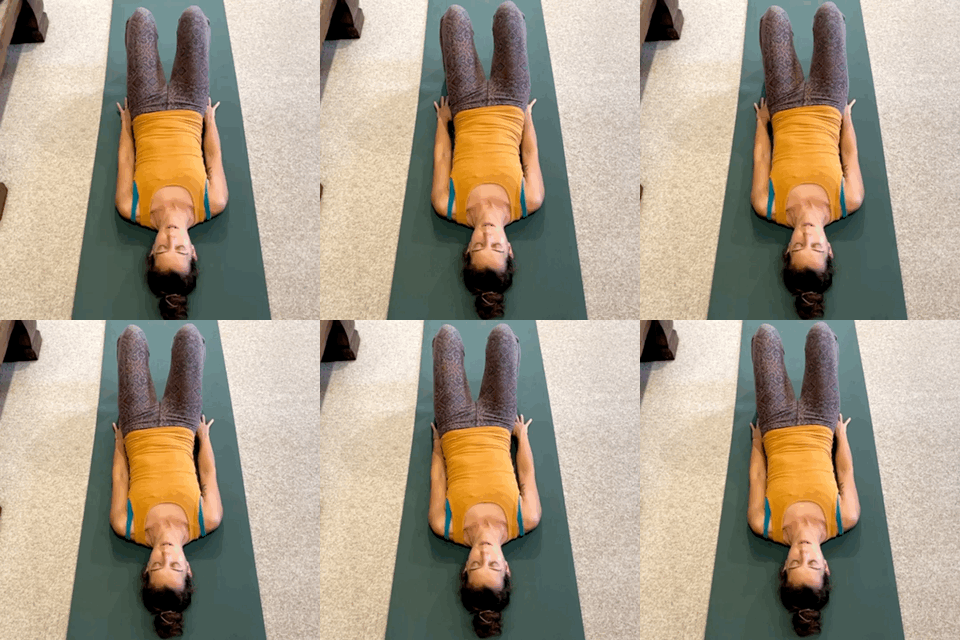
bridge prep, point fingers towards ceiling
visualize the connection points of the traps- base of skull, outer points of each scapula, and the thoracic vertebra. This forms a diamond
anchor through those points, imagine the diamond getting bigger, let the chin tuck slightly, breath and pulse
option to turn head from side to side
happy baby
gentle rolls
bottom arm extends like pillow, extend top leg, as leg floats down push into top arm to come to seated. Turn towards legs and gently melt into paschimottanasana
test neck again from crosslegged
Pec Release with Tennis Ball
Overview:Once the mid and lower traps are firing, tight pectoral muscles can start to soften and release, to help the should girdle better position on the rib cage. Here we will use a Tennis Ball to rfacilitate this process.
standing at a wall, place tennis ball underneath the collar bones, avoiding the sternum
gently lean into the wall, starting with minimal amount of pressure and only increasing as pec releases.
roll ball slowly back and forth along collar bone
After taking several passes over the pec attachment at the sternum, start to seek out a sensitive place. once a good spot is found, stay there and breath, with the option to increase pressure as the body responds.
continue along the collar bone stopping at as many special spots as you need. additional option to lean into the ball and gently twist